William Anderson
IT Services, Portfolio, Blog
Cloudflare Access + Synology SSO Server
A tutorial on how to integrate Cloudflare Access with a Synology SSO Server.
May 27, 2024
Homelab Tutorial

The goal of this tutorial is to log into Cloudflare Access applications by using your Synology DSM credentials.
Setup Synology SSO Server
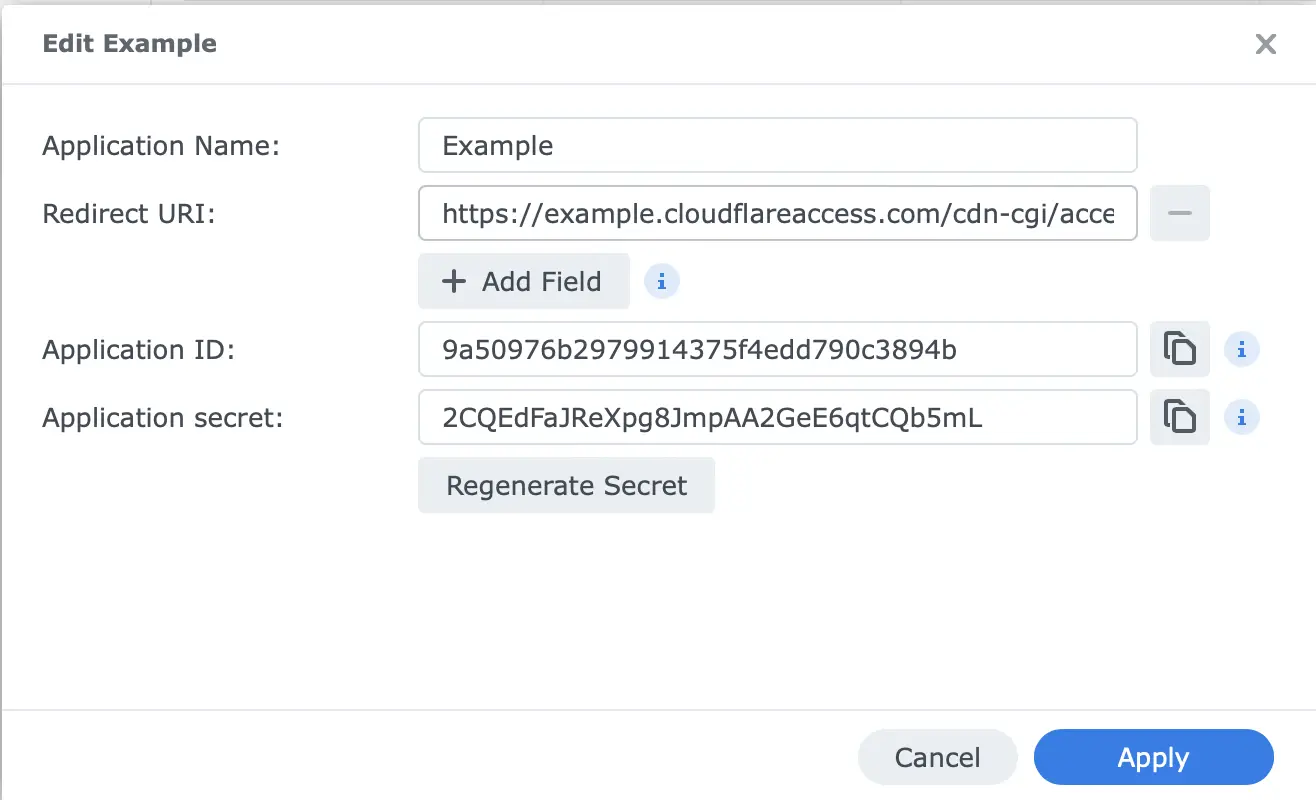
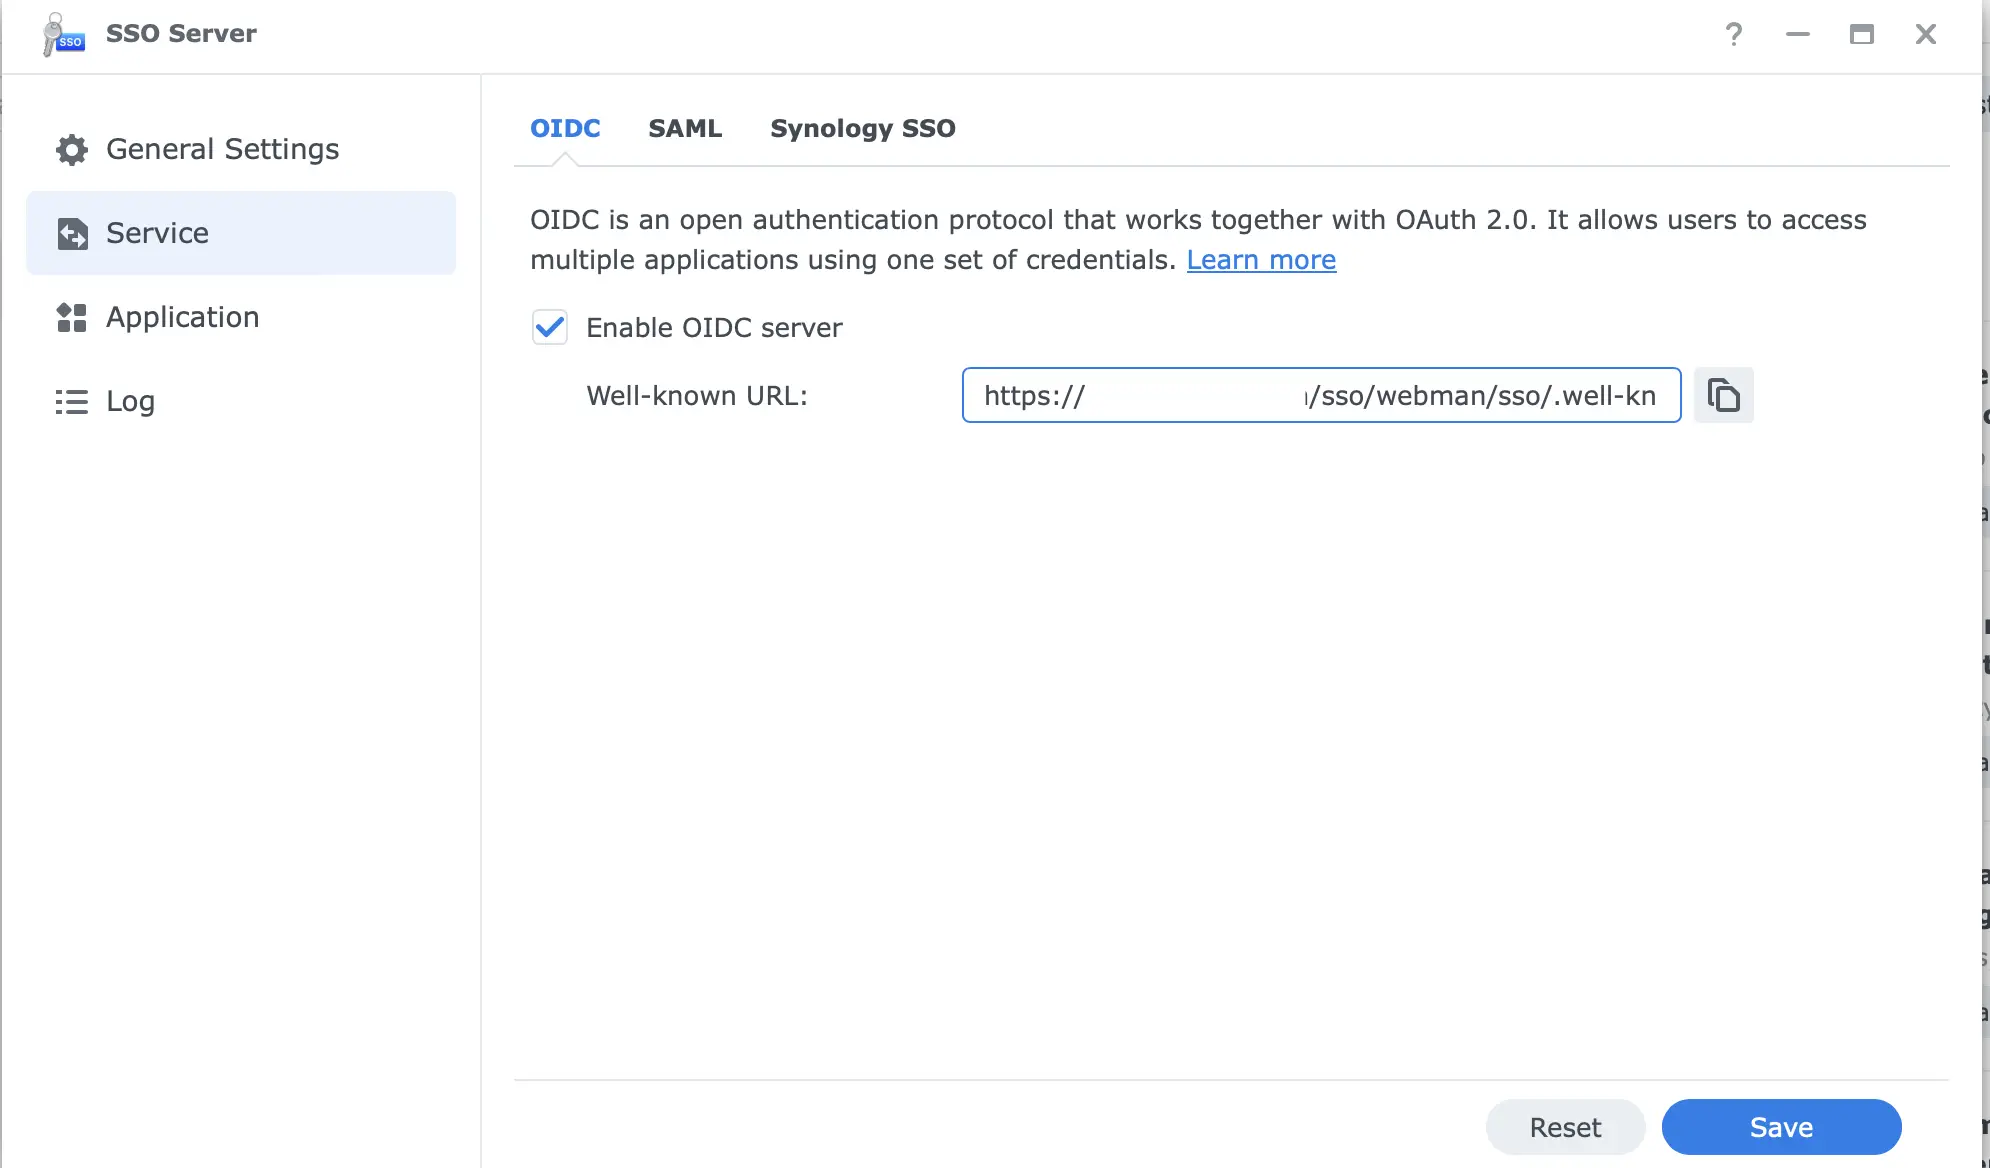
First download and install the Synology SSO Server package on your NAS by going to Package Center. From there open up the newly installed Synology SSO Server package and change the account type to ‘Domain/LDAP/Local’ to enable logging in using your DSM credentials. Then edit your server URL to the external URL you use to access your NAS. I added /sso to the end of my URL to provide distinction. Click ‘Service’ and enable the OIDC server with the checkbox and click ‘Apply’. Go to the ‘Application’ section in the sidebar. Click ‘Add’ then select ‘OIDC' and click ‘Next’. Name your application anything you'd like and enter your Cloudflare Access domain in the ‘Redirect URI Field’. Ex. https://example.cloudflareaccess.com/cdn-cgi/access/callback. From there click ‘Edit’ on your newly added application. This will show you the Application ID and Secret we will need for the next step.
Setup Cloudflare Access
Go to your Cloudflare dashboard and click 'Zero Trust' in the sidebar. Go to ‘Settings’ then ‘Authentication’ and click ‘Add New’ under ‘Login methods’. Choose ‘OpenID Connect’. Name your OIDC connection anything you’d like. Enter the ‘Application ID’ value from Synology SSO Server in the ‘App ID’ field in Cloudflare Access. Enter the ‘Application secret’ value in the ‘Client secret’ field. Next we will find the required URLs for Cloudflare Access by going to your Synology SSO Server and clicking ‘Service’ which will show the OIDC ‘Well-known URL’.
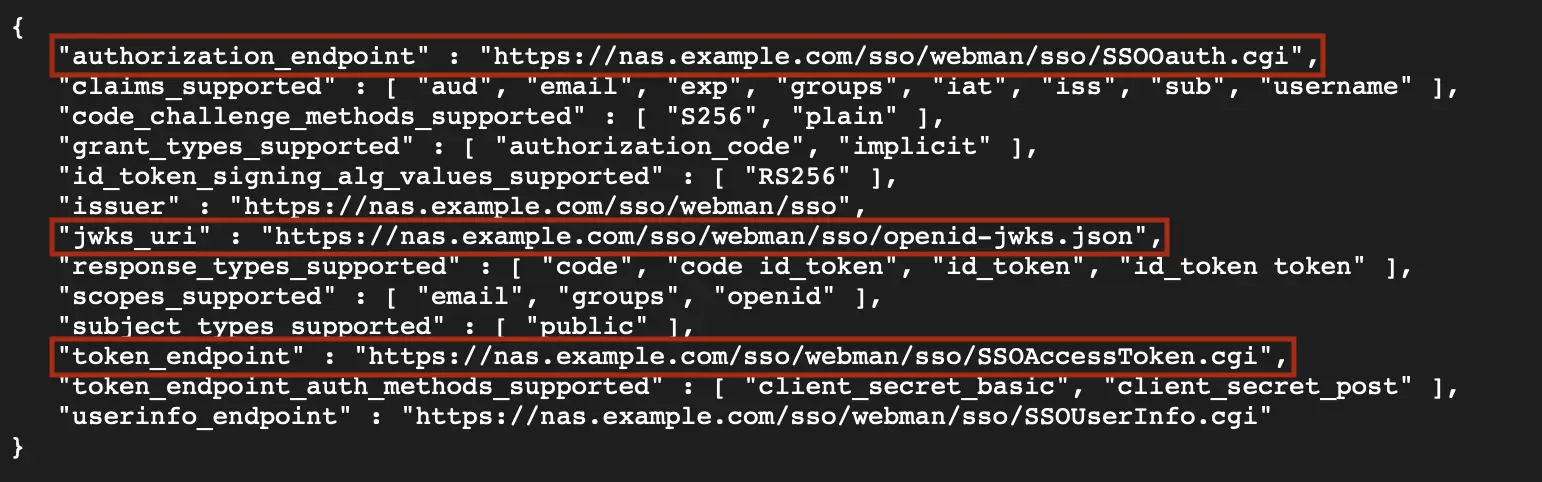
Open this URL in a new tab. Copy the ‘authorization_endpoint’ URL to the 'Auth URL' field in Cloudflare Access. Copy the ‘token_endpoint’ URL to the 'Token URL’ field. Copy the ‘jwks_uri’ URL to the ‘Certificate URL’ field.

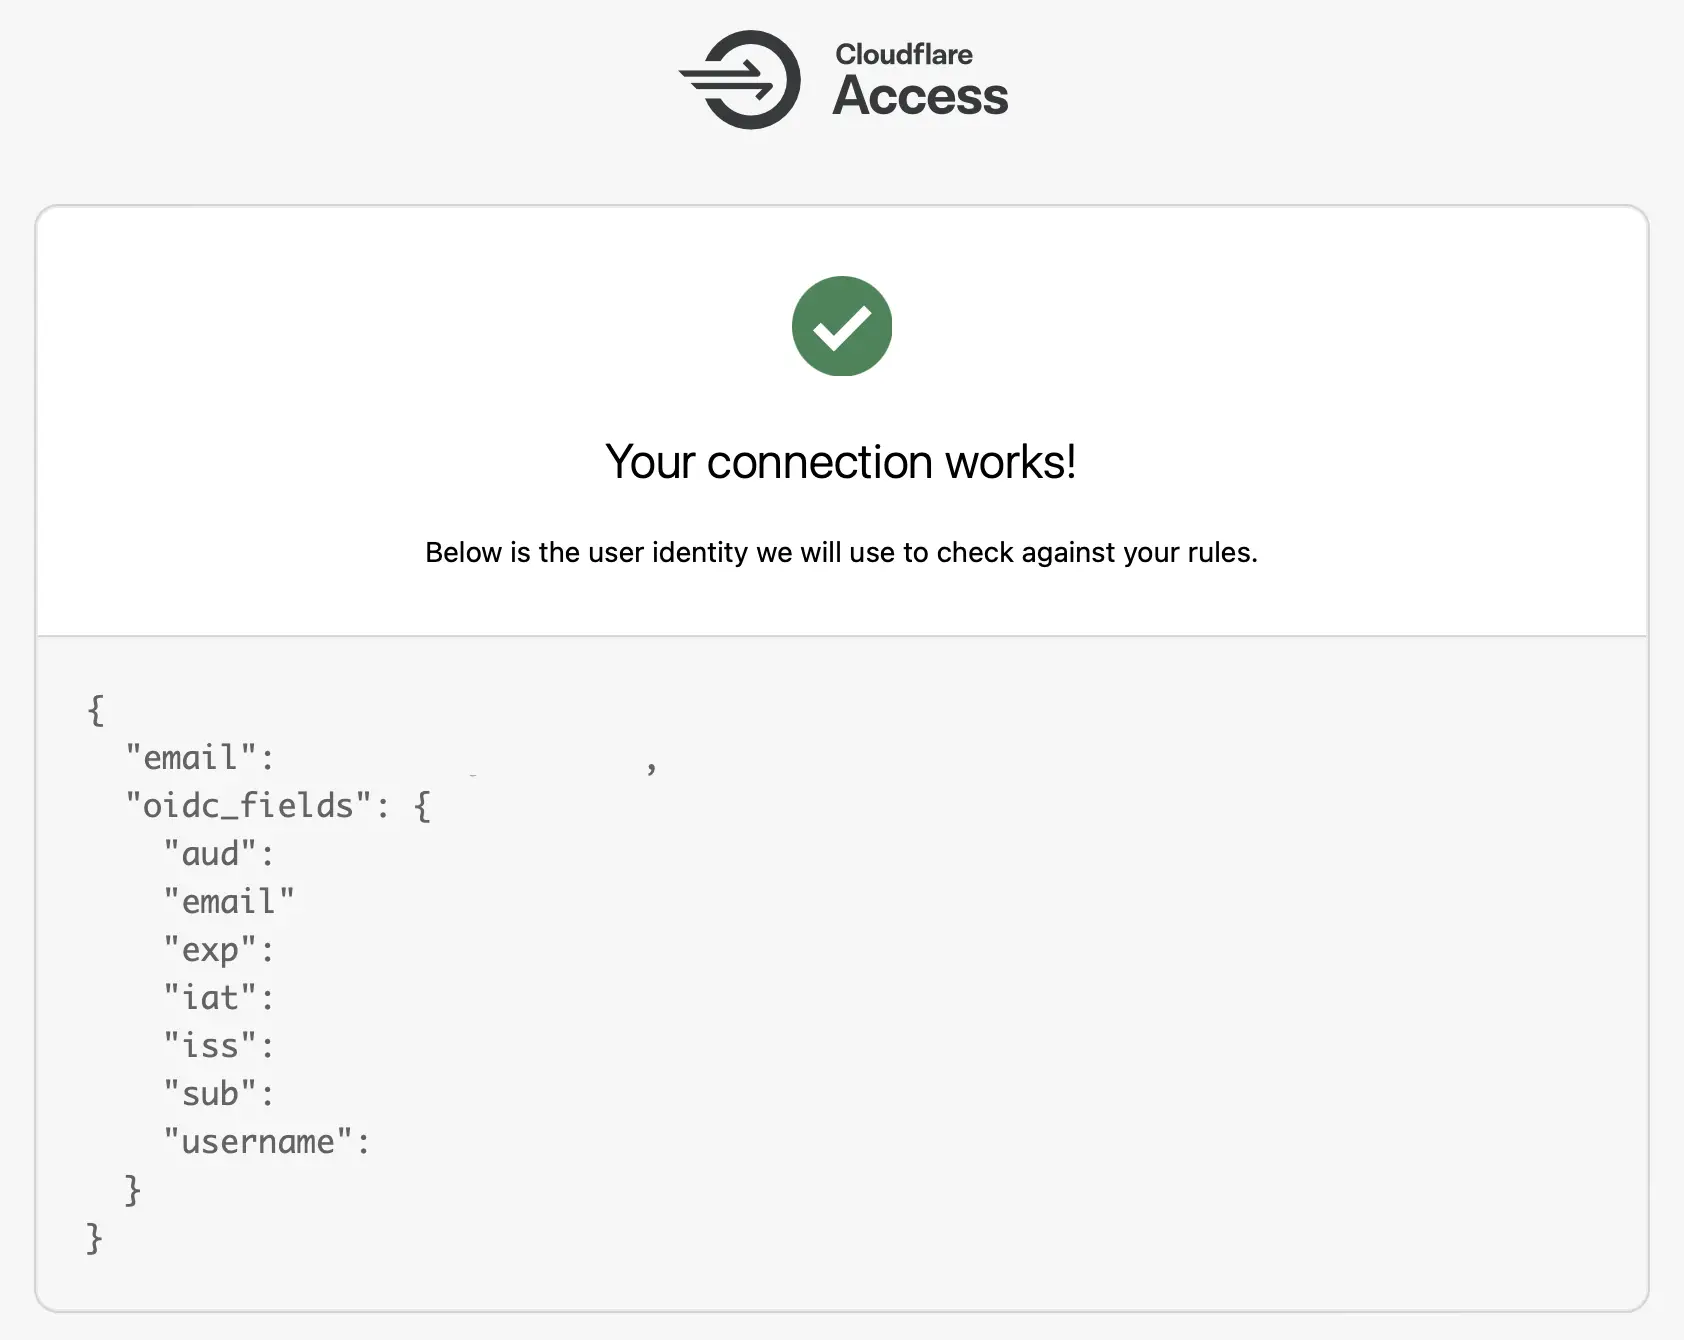
In the ‘Email claim’ field on Cloudflare Access type ‘email’. From there we can test our configuration by clicking the ‘Test’ button on Cloudflare Access. If everything is set up right you should see a success page. You can now save the configuration and add it to your Applications on Cloudflare Access.